INSTALLATION INSTRUCTIONS FOR LOFT LADDERS
Please read and watch these installation instructions carefully, including the enclosed product-specific assembly guide, before installing the loft ladder.


Do not use the ladder as an access passage during building or renovation work.
Do not use the ladder if the ceiling height exceeds the maximum ceiling height stated in the installation instructions or on the product label.
The ladder must be used only by one person at a time.
Do not use the ladder if it is faulty or damaged. Great care should be taken when removing springs. If the ladder is delivered unassembled, read enclosed assembly instructions.


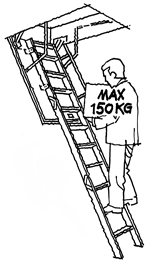
The load capacity of the loft ladder is maximum of 150 kg (including the person and any items they may be carrying - unless otherwise specified). Extra load from this may cause damage to the ladder and constitutes a risk of personal injury.


IMPORTANT: Lubricate all moving metal parts with oil immediately after assembly. Parts must subsequently be lubricated at least once a year (more frequently if used often)
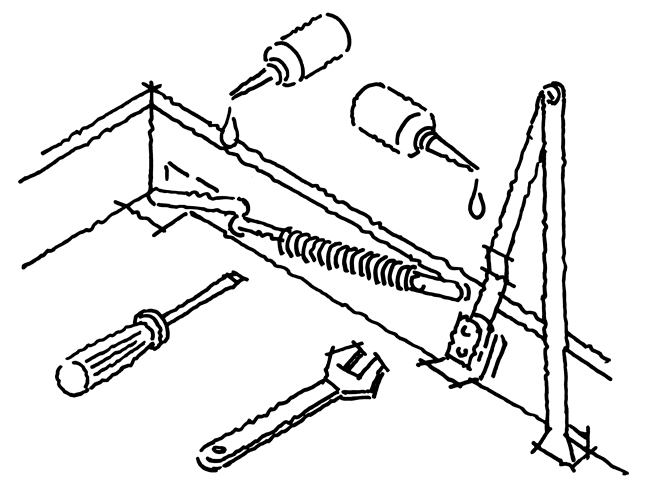



You will require the following materials and tools:
• Electric screwdriver
• Pencil
• Hand saw
• Folding rule or similar
• Square
• 100 mm screws
• Protective gloves
• Oil
• Timber for transverse joists – same dimensions as ceiling joists (if needed)
• Temporary support beams (approx. 20 cm longer than width of attic opening
• Wooden blocks and wedges
• A large step ladder
• A solid work platform
• Planks for work platform (if necessary)
The work platform should be high enough to allow you to climb up into the attic without exceeding the maximum permitted work platform height. The work platform must bear a load corresponding to the weight of the fitters plus the weight of the loft ladder.


We recommend that 2 people install the loft ladder. One fitter must be strong enough to lift the loft ladder to the ceiling (as the loft ladder weighs up to 50 kg, depending on model).
FOLLOW INSTRUCTIONS CAREFULLY
Please note: DO NOT DISMANTLE the loft ladder once it has been assembled.
For models in which the ladder is fixed to the trapdoor (not clickFIX® model). If, during installation, you wish to detach the ladder to reduce the weight of the loft ladder, loosen the screws between the metal bracket and the ladder itself. Do not loosen the screws on the trapdoor as these can easily be overtightened when reassembled. An overtightened screw may lose its grip on the timber and, in serious cases, fall out.
Positioning the loft ladder:
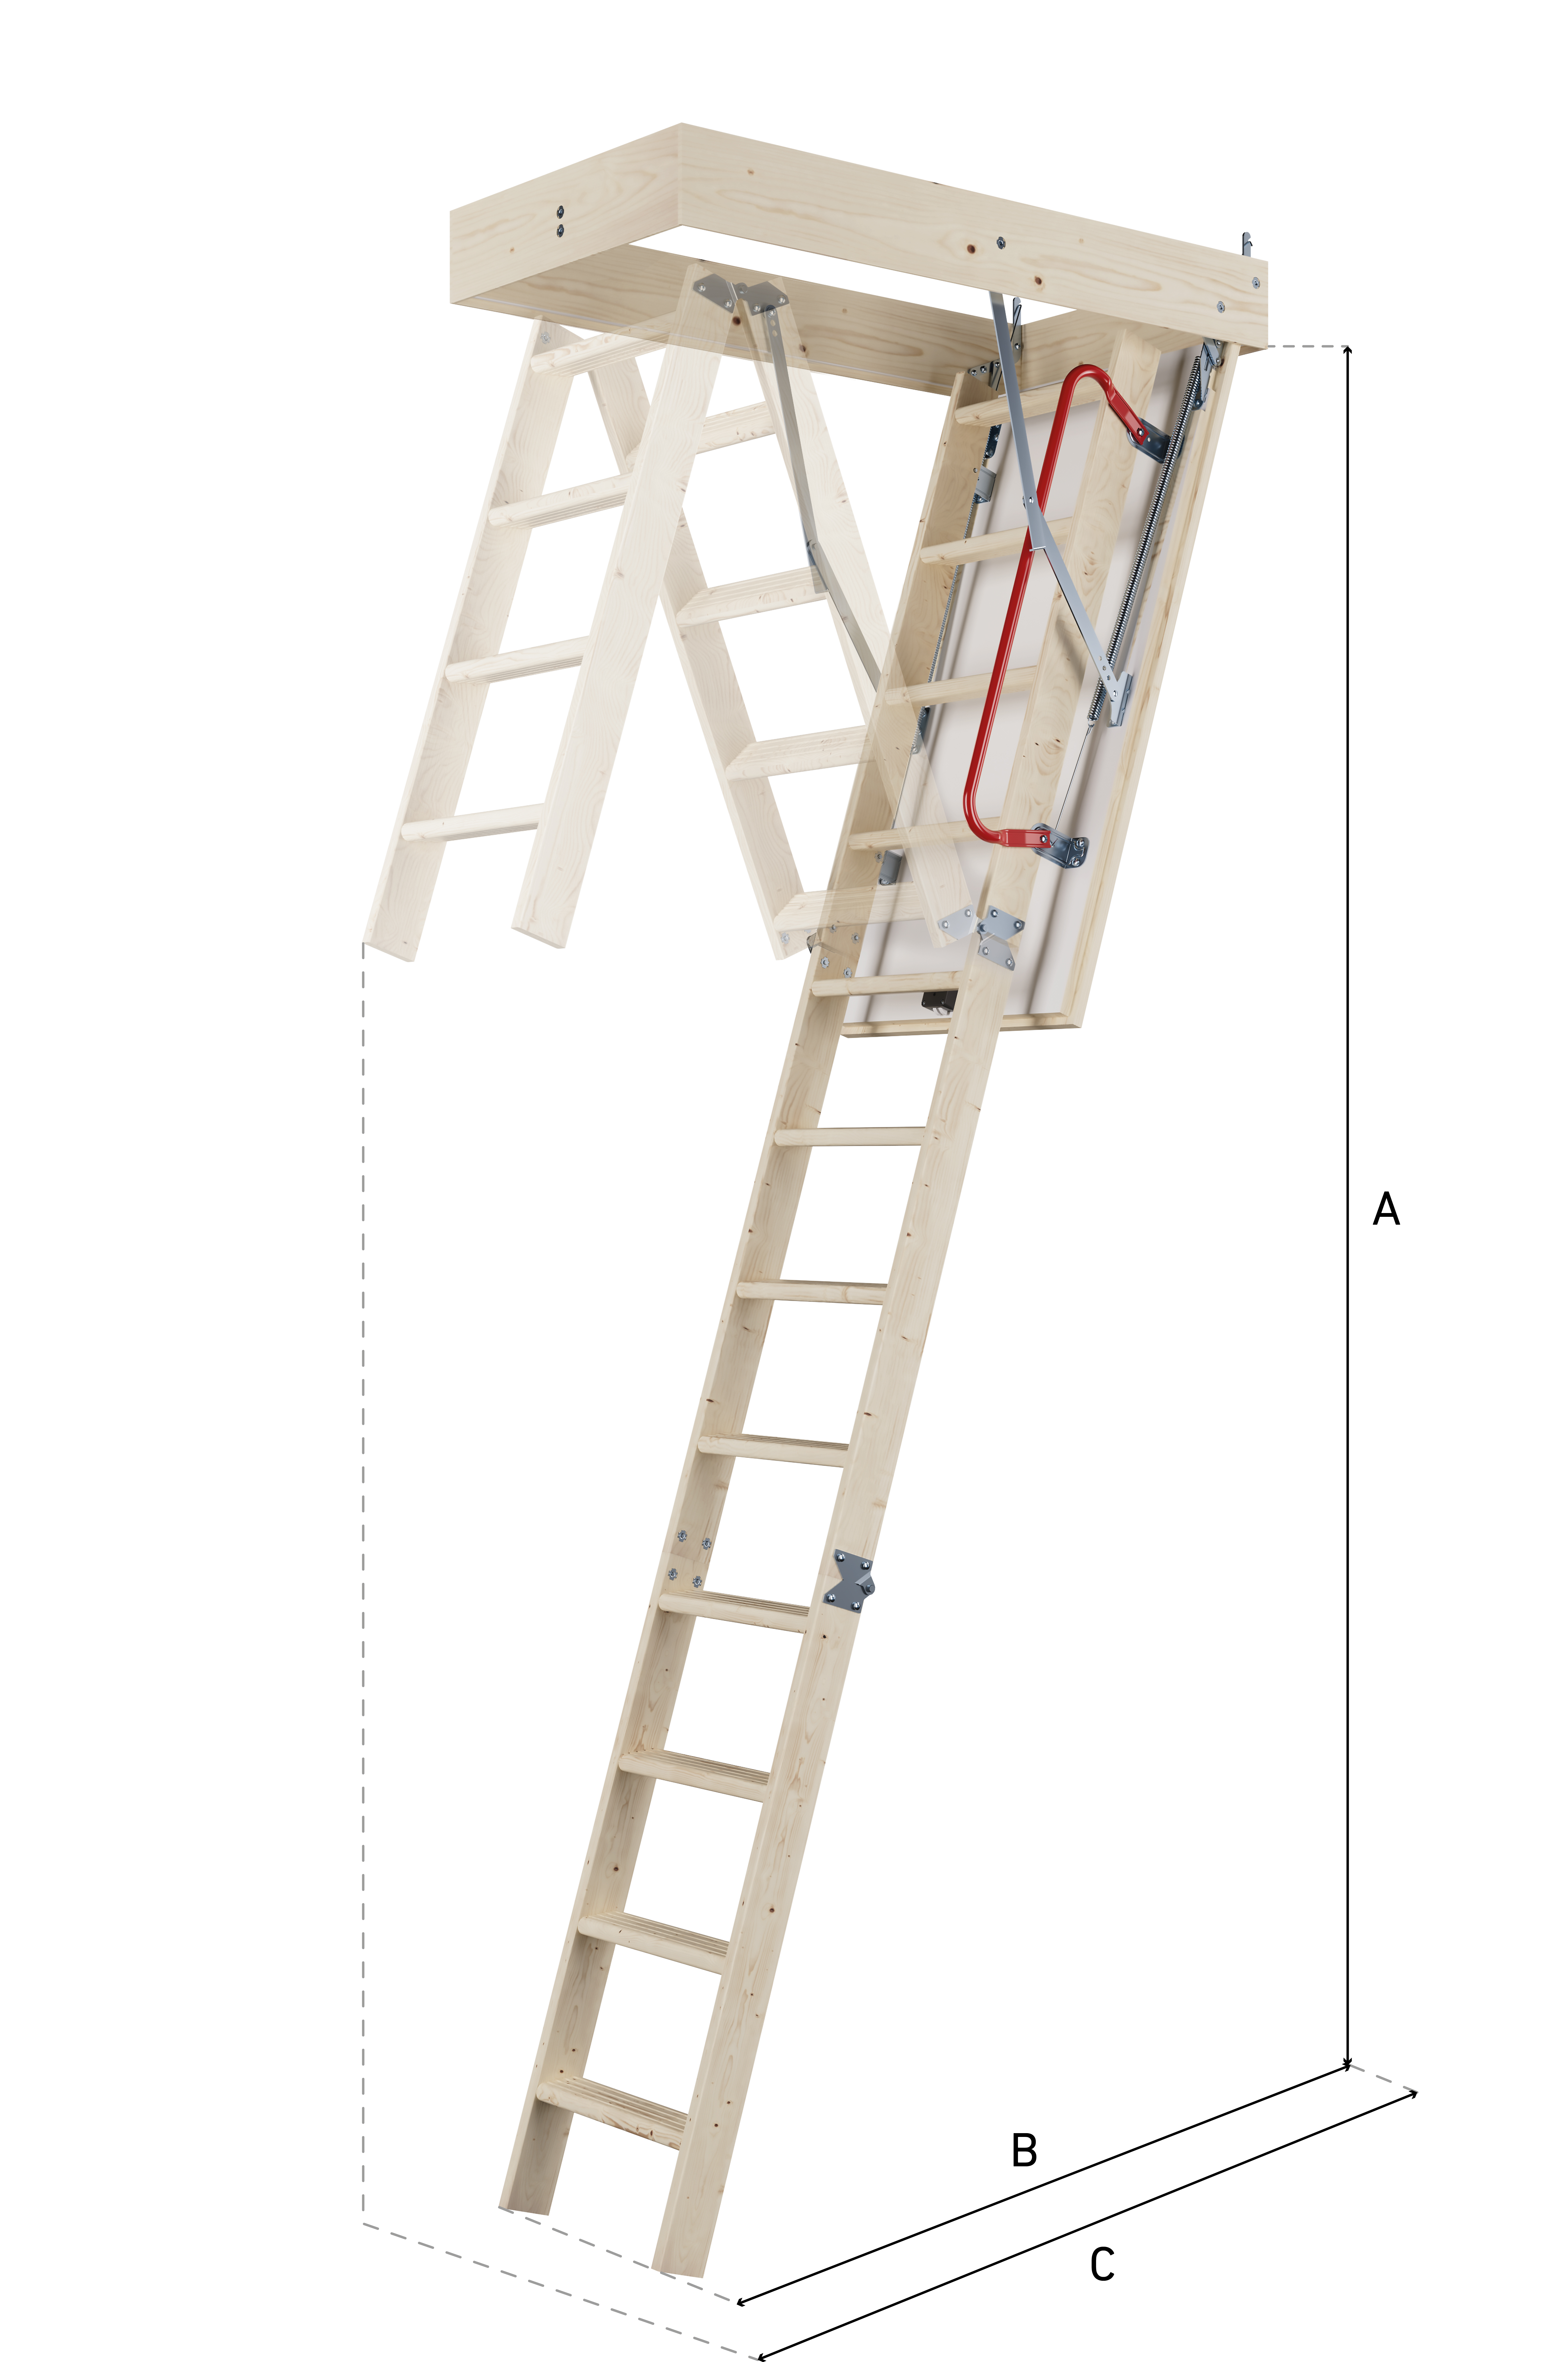
Wear gloves when removing insulation material. Check that the area selected for positioning the ladder is from electrical wiring, water pipes, heating/cooling pipes, etc. If necessary, get a qualified trade to remove and esure the area is clear . Make sure that there is sufficient clearance (distance B) for the ladder to rest on the floor. Make sure that there is sufficient space for the ladder to fold out to its full length (C). For two-section models, make sure that there is sufficient swing space. See these data under DOWNLOADS at each loft ladder. For specific measurements and adjustment options, see the assembly instructions supplied with the product.


To make opening in ceiling
We recommend that you wear goggles and mask for protection. Protect the area from falling dust and other particles from the loft space. Remove all items of furniture from the work area and cover the floor.
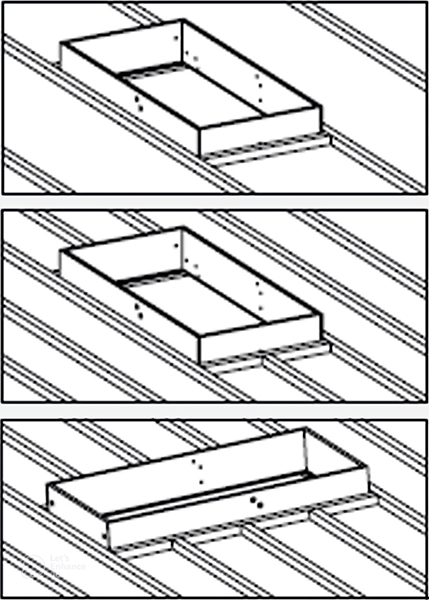
Frame and cut the opening through plaster or other ceiling material. The recommended opening size is stated on the loft ladder packaging. The opening must be at least 10 mm longer and 10 mm wider than the ladder casing. This allows space for spacer blocks and ensures that the loft ladder is fitted square. If the loft ladder cannot be fitted in the normal way, i.e. parallel with the ceiling joists, contact a qualified trade for advice. Figures to the left show how to frame the ceiling opening. If the loft ladder is to be installed parallel to the rafters, a frame must be constructed in the loft floor so that the casing can be secured on all four sides. The opening for the loft ladder should match the recommended opening size for the loft ladder model. If necessary, the dimensions can be adjusted using a trimmer. If in doubt, it is advisable to consult a professional.
If the loft ladder is to be installed across the rafters, a trimmer must be installed between the rafters. This should be carried out by a professional to ensure that the load-bearing capacity of the rafters is not compromised.
WARNING: If the ceiling joists are made in a material other than timber, e.g. steel, contact a qualified trade. Never saw through a load-bearing joist without advice from a qualified engineer. Take great care when sawing ceiling joists. For safety's sake, if there is no loft flooring, lay planks across the ceiling joists to allow safe passage in the loft during installation.
IMPORTANT INSTALLATION TIPS
Fitting temporary supports
To keep the loft ladder in place in the ceiling opening during installation, you are advised to fit temporary supports. If the trapdoor will be clad, the loft ladder must be fitted as many mm higher in the opening as the thickness of the cladding.
WARNING: It is important that cladding is fitted firmly and correctly. When affixing cladding, the ladder must NOT be loaded.
Vapour barrier
When the loft ladder is firmly attached to the deck, the vapour barrier must be attached in the correct way. The space between the loft ladder and the joist construction must be well-insulated to avoid thermal bridges.
Attaching the loft ladder
One fitter goes up into the loft space, taking all the tools they need. The other fitter remains below. clickFIX® models can be installed by one person (using a work platform). Lift the ladder up into the loft. Before lowering the loft ladder into the opening from above, attach 2 supporting planks under the ceiling opening. The loft ladder rests on these supports (see above movie).
Fold the ladder so that the frame can be attached to the ceiling opening. Make sure that the loft ladder is level and square. Attach the loft ladder with 100 mm screws (3 on each long side and 2 at each end - see movie). Don't forget to attach blocks on the back of the fixing points.
When the loft ladder is firmly attached, remove supports.
WARNING: Do not use the loft ladder before it is firmly attached to the opening and adjusted to the correct ceiling height.
Adjusting to correct celing height
Pull down and unfold the ladder. Fold the lower section of the ladder under the middle section, so that the top and middle sections are aligned. Make sure that the treads are horizontal. To shorten the ladder precisely, follow the instructions for the specific model. Note whether the ladder is supplied with plastic feet. For most models, the ladder can be fine-tuned after shortening. DO NOT SHORTEN THE LADDER TOO MUCH. If the ladder is too short, it may unexpectedly fold up during use, thus risking serious personal injury. To check that the ladder is the correct length, unfold it to its full length. All sections of the ladder must be aligned perfectly with no gaps, and both strings must rest flat on the floor.
WARNING: Do NOT use the ladder if all sections of the ladder are not aligned. If the ladder is too long, shorten the strings once more. If the ladder is too short, order a new lower section from your dealer. Do NOT allow the ladder to rest on a box, blocks, platform or similar. Such constructions are unsafe and unstable, and do not provide appropriate permanent support for the ladder.
Adjusting the lock
The following video shows how to adjust the clickFIX® lock. It is important to adjust the lock housing to ensure the loft ladder fits tightly, preventing condensation and mold above the trapdoor.
How do I know that the trapdoor is correctly adjusted?
It should close without being forced, and the trapdoor should sit flush with the ceiling. Stand under the loft ladder when adjusting the lock.
How to use the ladder
For safety's sake, always face the ladder when climbing up and down and grip at least one string of the ladder (or grip the handrail). The following video show how to use the loft ladder safely.
Spring mechanism
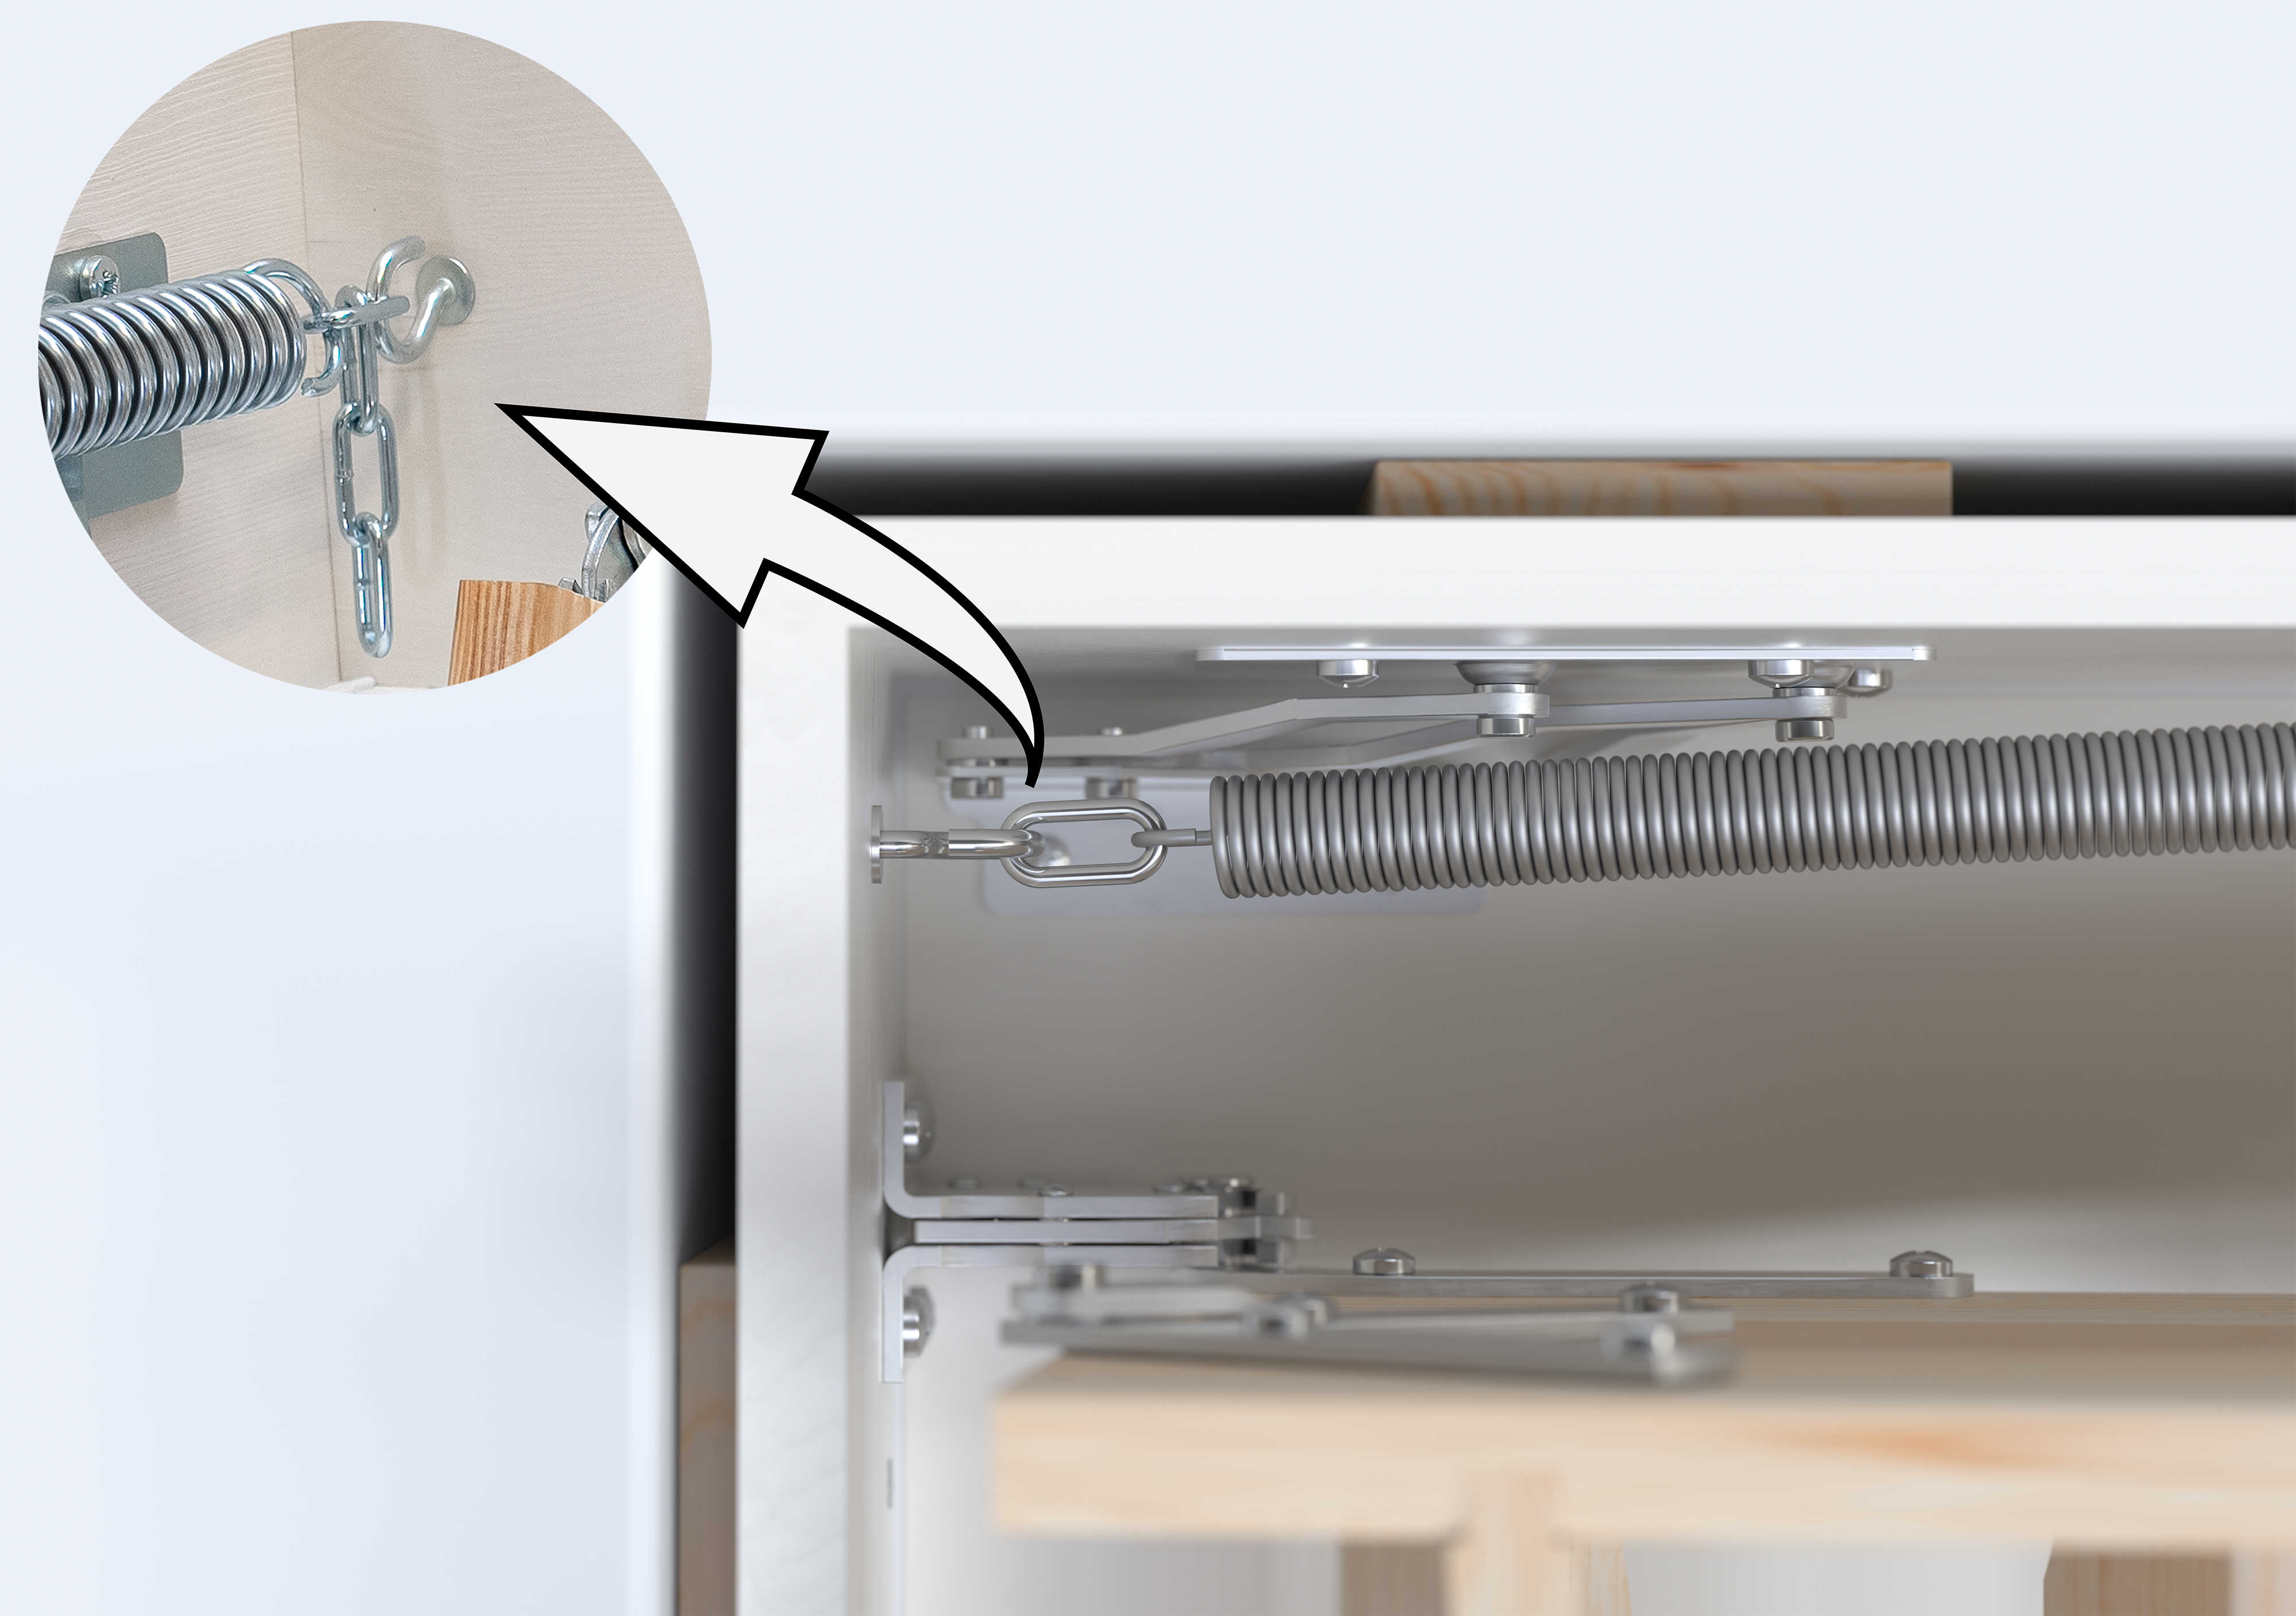
The spring mechanism can be re-adjusted inside its frame using a chain link or by moving the springs up or down (depends on the model in question). Always adjust the spring mechanism when the trapdoor is closed. It may be necessary to adjust the spring mechanism if the trapdoor is to be clad. Take great care when making adjustments as the springs are very taut. Accidental release of the springs may cause personal injury.
Right: Example shown is clickFIX® 76G series.

DOLLE loft ladders are classified under Usage Class 2, as defined by the European system for wood-based materials and their resistance to moisture.
The usage classes for wood-based materials are divided as follows:
- Usage Class 1 – Dry environments: Characterized by a relative humidity that only exceeds 65% for a few weeks per year. Examples include heated buildings such as residential homes, offices, and shops.
- Usage Class 2 – Humid environments: Characterized by a relative humidity that only exceeds 85% for a few weeks per year. Examples of buildings include ventilated, non-permanently heated structures such as holiday homes, unheated garages, and storage buildings, as well as ventilated constructions protected from precipitation, such as ventilated roof structures.
- Usage Class 3 – Outdoor protected environments: Characterized by a higher moisture content than that found in Usage Class 2. Examples include structures in damp rooms, outdoor scaffolding, and substrates for roofing felt.
DOLLE loft ladders are therefore suitable for Usage Class 2, where materials are exposed to higher humidity than in dry environments but not to constant high moisture levels. This classification makes the loft ladders ideal for installation in buildings such as holiday homes and garages (excluding carports), where humidity levels may be high at times but where adequate ventilation is present.
IMPORTANT:
Never modify the product. The manufacturer accepts no liability whatsoever for personal injury or damage caused to the building or parts thereof by a product, whose construction has been modified.
Maintenance tips for loft ladder
In general, a loft ladder does not require much maintenance beyond ordinary cleaning with a wet cloth hard-wrung in soapy water. With a relatively small effort, you can keep the functions of the staircase intact.

Inspect the wooden ladder for moisture and formation of mould on treads and strings. The ladder can be cleaned with a cloth hard-wrung in soapy water. Do not leave water on the ladder. Aluminium ladders are also to be cleaned with a cloth hard-wrung in soapy water.


Clean with a wet cloth hard-wrung in soapy water. If the trapdoor opens too fast, it is possible to tighten the spring by shortening / moving the chain link (or similar) placed at the upper end of the casing.
Likewise, the position of the lock strike can be adjusted so that the trapdoor remains completely tight. Loosen the two screws and adjust the lock strike slightly up or down.


All moving metal parts must be lubricated with acid free oil at least once a year (more frequently if used often).


Inspect and remove any dirt with cloth hard-wrung in soapy water.
SPARE PARTS AND ACCESSORIES
Find spare parts or accessories for your loft ladder based on the specific product number. Here you can also find accessories to improve safety like handrail and balustrade.
